


Deploy Laravel app on Hostinger (shared hosting)
-
 Writen by Mohamed Slimani
 - Category Laravel
- Date 29/06/2024
Hostinger is my favorite hosting provider. I have had a premium plan for three years now, and I would recommend them to anyone wanting a cheap and reliable hosting plan. I host my portfolio, built with Laravel, on Hostinger. However, I've noticed that for beginners, it might be challenging to host a Laravel app on Hostinger or any other hosting provider due to limitations and the lack of root access on shared servers. In this article, I will show you how to host your Laravel app on Hostinger. These steps will also apply to most hosting providers with a shared server plan.
Before We Start
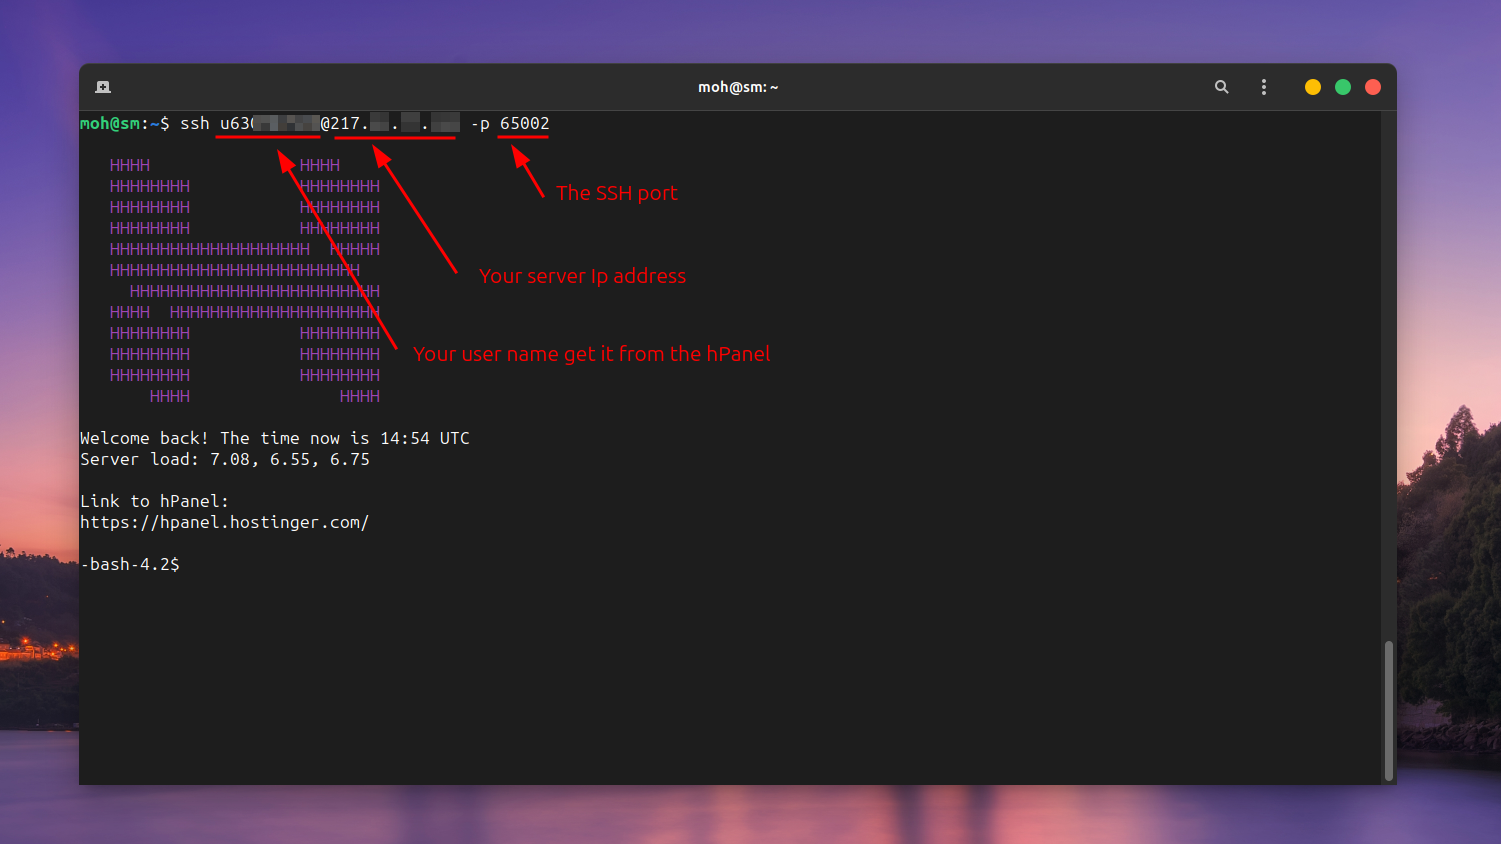
We will use Git over SSH to get our files onto the server. This method is the best way to keep your project up to date. It's recommended to request terminal access to the server. If you don't already have terminal access, a quick call to support will activate this option for you. While you're at it, ask them to add your SSH id_rsa.pub key to the server and inquire about the SSH port and how to connect via SSH. Also, make sure your domain is set up and you can access the default Hostinger landing page.
Note: Redis is not installed on the server, and you can't use Node.js. If you are using vite, make sure to build your assets and include them in version control because you can't build on the server.
Deployment process
Prepare the database
- In the hPanel, open the databases tab.
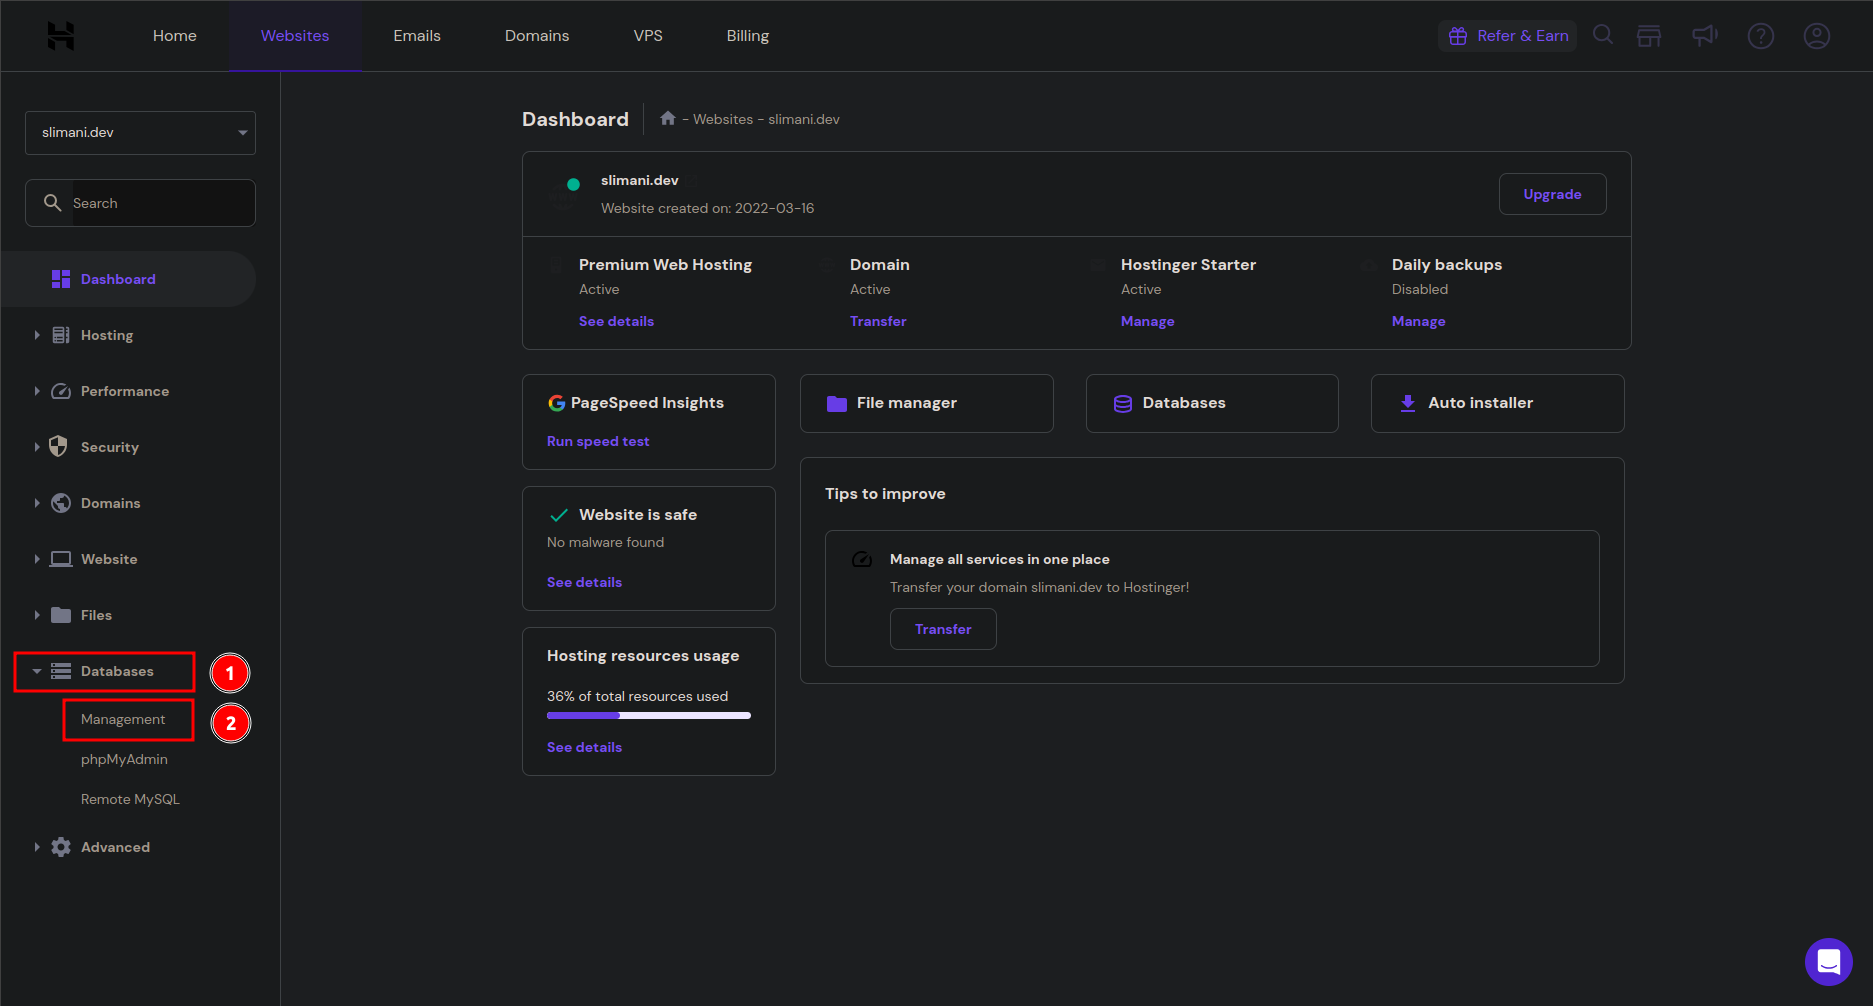
- Create a database.

SSH to the server
- To be able to clone your project you need to generate an ssh key usin
- This creates a new SSH key, using the provided email as a label.
ssh-keygen
> Generating public/private ALGORITHM key pair.
When you're prompted to "Enter a file in which to save the key", you can press Enter to accept the default file location. Please note that if you created SSH keys previously, ssh-keygen may ask you to rewrite another key, in which case we recommend creating a custom-named SSH key. To do so, type the default file location and replace id_ALGORITHM with your custom key name.
> Enter a file in which to save the key (/home/YOU/.ssh/id_ALGORITHM):[Press enter]
- At the prompt, type a secure passphrase. For more information, see "Working with SSH key passphrases."
> Enter passphrase (empty for no passphrase): [Type a passphrase]
> Enter same passphrase again: [Type passphrase again]
- Copy the public key:
cat ~/.ssh/id_rsa.pub
- Past you key to the setting in your repository > access keys
Clone your project & install the dependencies
- Change directory to your public_html directory that will be inside domain/<your.domain>/public_html
cd domains/slimani.dev/public_html/
- Clone your repository here
git clone [email protected]:XXXX/slimani.dev.git
-bash-4.2$ git clone [email protected]:XXXX/slimani.dev.git
Cloning into 'slimani.dev'...
Warning: the ECDSA host key for 'bitbucket.org' differs from the key for the IP address '2406:da00::9f55'
Offending key for IP in /home/u630787929/.ssh/known_hosts:3
Matching host key in /home/u630787929/.ssh/known_hosts:14
Are you sure you want to continue connecting (yes/no)? yes
remote: Enumerating objects: 4369, done.
remote: Counting objects: 100% (4369/4369), done.
remote: Compressing objects: 100% (3636/3636), done.
remote: Total 4369 (delta 726), reused 4278 (delta 679), pack-reused 0 (from 0)
Receiving objects: 100% (4369/4369), 116.66 MiB | 13.14 MiB/s, done.
Resolving deltas: 100% (726/726), done.
Updating files: 100% (4738/4738), done.
-bash-4.2$ ls
slimani.dev
- A new folder will be created but we want to move every this from that folder to the public_html folder. do it like this
mv slimani.dev/* .
mv slimani.dev/.* .
- Wwe no longer need that empty folder now so just remove it
rmdir slimani.dev

- Now we need to download composer so we can install the dependencies
php -r "copy('https://getcomposer.org/installer', 'composer-setup.php');"
php -r "if (hash_file('sha384', 'composer-setup.php') === 'dac665fdc30fdd8ec78b38b9800061b4150413ff2e3b6f88543c636f7cd84f6db9189d43a81e5503cda447da73c7e5b6') { echo 'Installer verified'; } else { echo 'Installer corrupt'; unlink('composer-setup.php'); } echo PHP_EOL;"
php composer-setup.php
php -r "unlink('composer-setup.php');"
- Installing the dependencies, refer to the Laravel Documentation for more details.
php composer.phar install --optimize-autoloader --no-dev
Configure the app
- Create the .env file:
cp .env.example .env
- Generate the app key:
php artisan key:generate
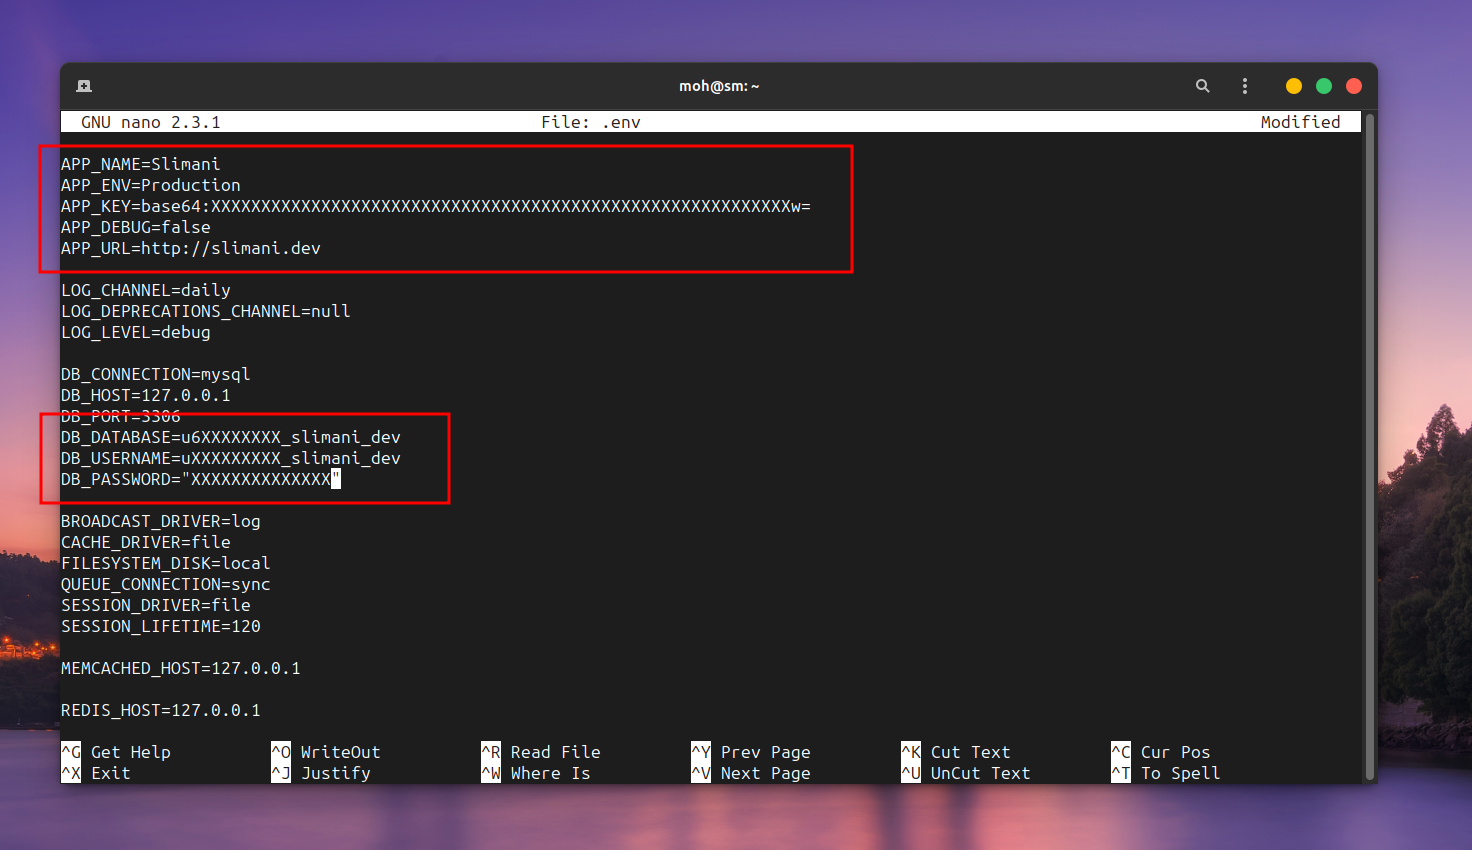
- Fill in the database variables from before:
nano .env
- Run the migration:
php artisan migrate
- Finally run the optimize command:
php artisan optimize
That's It
just visit your website now
Hosting a Laravel application on Hostinger or any other shared hosting provider can be challenging for beginners due to server limitations and lack of root access. However, by following the steps outlined in this guide, you can overcome these challenges and successfully deploy your Laravel app. Using SSH and Git for deployment ensures that your project remains up-to-date, and configuring your database and app settings properly is crucial for smooth operation. With a bit of initial setup and understanding, you can leverage Hostinger’s affordable and reliable hosting services to run your Laravel applications effectively. Happy hosting!
Tags :
-mix-thumb.jpg)